
.jpg)

DIY Pallet Keepsake Box | Rustic Vintage Looking Woodworking Project Tutorial [Pallet Keepsake Box]
- DIYTechnician

- Mar 9, 2021
- 2 min read

After ripping apart a bunch of pallets it was time to knock the nails out of the pallet slats.

I like to use a combination of a hammer as well as pry bar for removal.

Once I cut some clean sections of pallet slats ready it was time to measure some of them up and get them cut. For this box I went with 12" sections.

I used my dewalt chopsaw for making the cuts. Here's a paid link to one on amazon.

I cut the boards all the same size and tried to use pallet slats that were of similar thicknesses.
Using the dewalt chopsaw again, I cut 45 degree angles on each corner of every board I cut.

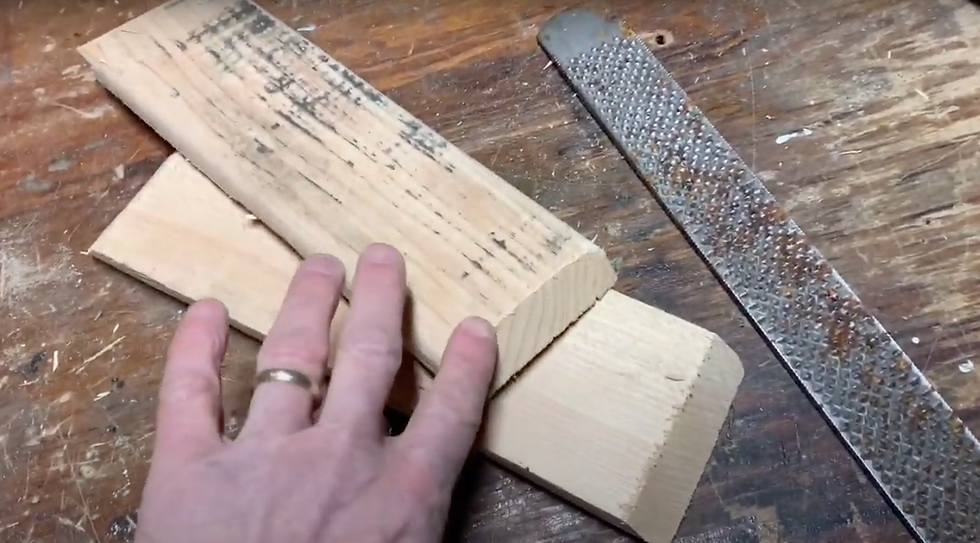
The chop saw will sometimes leave a rough edge so I took a hand file (wood rasp) and filed down the rough edges a little.

I tacked the ends of the boards together with my 18gauge craftsman battery powered brad nailer.
Below is a link on amazon to the nailer I used for this job (paid link):

I tack both boxes all together and try to make them identical as they will stack on each other.

Next is to put a bottom on this so I cut three boards for the bottom and installed them.

For the bottom boards installation I first tack them in with the brad nailer on all sides to hold them firmly in place. I later pound some lighter gauge nails in for a more permanent and stronger hold.

I cut four corner pieces that will strengthen the inside. They get install in all four corners.

I nail these in with the brad nailer from every possible angle including the bottom.

Pictured here is the light gauge nails I use to secure all the boards.

For the top I cut three boards to length that matches the box and then secured the together with a couple of cross member boards that will be underneath the hinged top.

This was a vintage cupboard or drawer handle that I had laying around just begging to be used for a project like this. I was happy to finally put it to good use. It came out of an old house. I used a drywall or wood screw and came up from the bottom then threaded the knob down onto the protruding screw. Turned out to be a nice tight fit.

These old hinges I found in an old house as well and were kept in a parts drawer for years. Perfect application for these. I found a bunch of almost identical screws to secure them in.

I was liking how this was turning out as far as looking old/vintage/rustic or whatever you want to call it. This was a present for someone very close to me.

We hit it with some pre-stain. I would not have known to do this had it not been for some old guy at Lowe's who recommended it. It makes the stain go on nice. It's like a primer for lack of better terms.

After letting the pre-stain dry for about an hour (you only need a half an hour) we hit it with the walnut stain. Turned out just the way we pictured.

Thanks for watching!!!


Comments